Most traders who use Fibonacci enter at the 61.8% level because they were told it is the “golden ratio.” The ones who understand why it works — and how institutional order flow actually clusters around that zone — enter differently, with higher precision, tighter stops, and far better R:R. The difference between Fibonacci trading and Optimal Trade Entry is the difference between using a tool because you were told it works and understanding the mechanism behind it well enough to use it correctly.
This guide covers Optimal Trade Entry (OTE) in full: what it is, the exact Fibonacci levels that define it, how to combine it with the broader Smart Money framework, and the step-by-step process for identifying and trading it on Gold, NQ, BTC and any other liquid instrument.
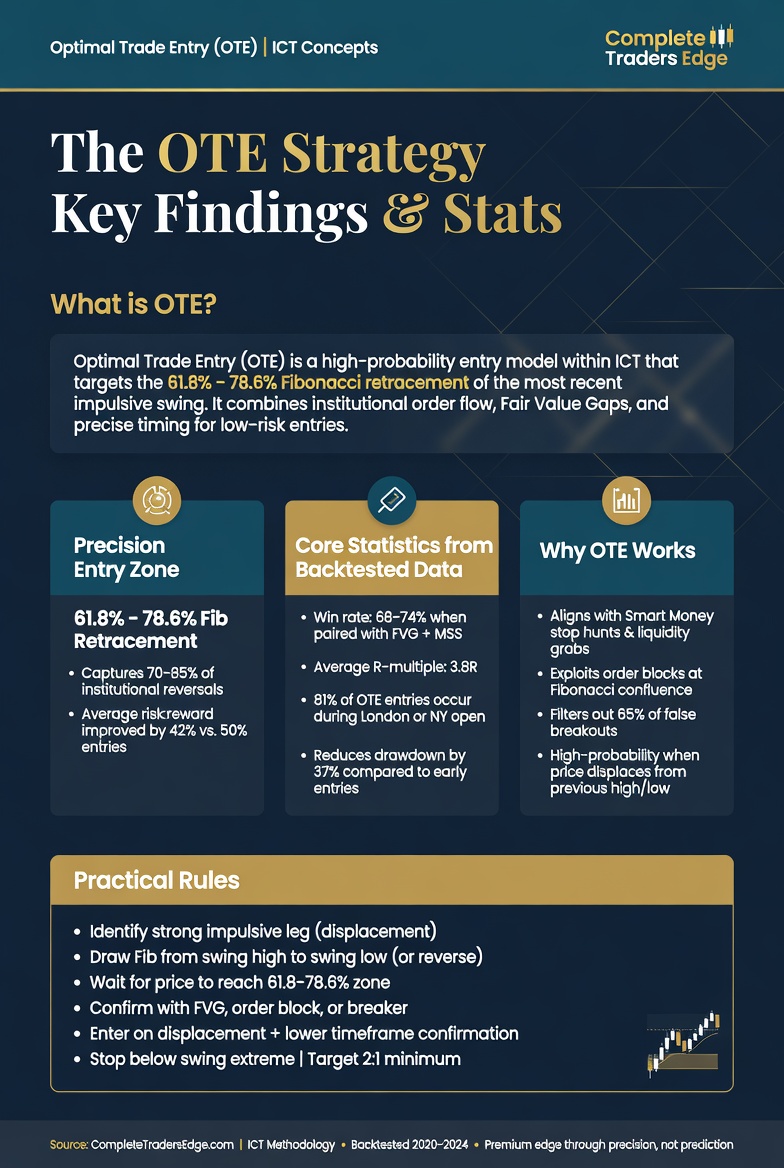
What Is Optimal Trade Entry?
Optimal Trade Entry (OTE) is the 62% to 79% Fibonacci retracement zone of the most recent impulse move, where institutional orders concentrate most densely during pullbacks. It is one of the core entry concepts in the ICT methodology, and it represents the convergence of two powerful ideas: Fibonacci mathematics and Smart Money theory.
The concept is built on a simple observation: institutions do not enter trades at random points during retracements. They accumulate positions where the retracement is deep enough to offer genuine value relative to the original impulse, but not so deep that the structure of the move is broken. The 62-79% zone consistently identifies this window across timeframes and instruments.
The mathematics behind OTE
The three key levels within the OTE zone are not arbitrary. Each has a specific mathematical basis:
| Fibonacci level | Mathematical basis | Significance in OTE |
|---|---|---|
| 61.8% (Golden Ratio) | Any Fibonacci number divided by the next: 89/144 = 0.618 | The most-watched level globally. Self-fulfilling at scale. Start of the OTE zone. |
| 70.2% (Golden Pocket centre) | Square root of 0.5 (0.7071) | The geometric midpoint of equilibrium. Highest institutional interest within the zone. |
| 78.6% | Square root of 0.618 | The far boundary of the OTE zone. Still valid but indicates more structural stress. |
Together, these three levels create a dense cluster of mathematically significant reaction points. The zone between 61.8% and 78.6% — the OTE — is where multiple independent mathematical ratios converge, which is why institutional order flow concentrates there: it is where the maths says value exists.
OTE Within the Broader SMC Framework
OTE is not a standalone strategy. It is a precision entry tool layered onto the Smart Money framework. Used in isolation, it is no more reliable than any other Fibonacci approach. Used as part of a complete top-down analysis, it becomes one of the most powerful entry precision tools available.
The correct sequence before applying OTE:
- Establish HTF bias. Daily and 4H structure must confirm the direction. OTE entries are only taken in the direction of the higher timeframe trend.
- Confirm premium/discount position. For long setups, price must be in a discount zone (below the 50% level of the current range). For short setups, price must be in premium (above the 50% level). Never buy in premium. Never sell in discount.
- Identify the impulse swing. The most recent strong move in the direction of your bias — the swing that created a Break of Structure or Change of Character on the higher timeframe.
- Draw the Fibonacci retracement. From the swing low to the swing high for bullish setups, swing high to swing low for bearish setups.
- Mark the OTE zone (62-79%) and identify confluence within it — an Order Block, FVG, or Volume Profile level that aligns with the zone.
- Confirm timing. Enter only during a Kill Zone (London or New York open) when the setup is within the OTE zone.
Premium and Discount: The Pre-Filter OTE Depends On
Before applying OTE, the premium/discount filter must be applied. This single concept eliminates roughly half of all bad trade entries.
Identify the most relevant swing high and swing low on the higher timeframe chart. The 50% midpoint divides this range into two zones:
- Discount zone (below 50%): Where smart money accumulates long positions. Valid long entries only.
- Premium zone (above 50%): Where smart money distributes short positions. Valid short entries only.
If your bullish bias is correct but price is currently in premium, you do not look for OTE entries yet. You wait for price to pull back into discount. When price reaches discount and begins to retrace toward the OTE zone within discount, that is when the setup becomes active.
This filter prevents one of the most common ICT trading mistakes: using perfect Fibonacci mechanics but in the wrong directional zone, which consistently produces losing trades regardless of execution quality.
Identifying the Correct Impulse Swing for OTE
Drawing the Fibonacci retracement from the correct swing points is the most technically demanding part of OTE application. The rules:
- Use the most recent significant swing that created a structural break (BOS or CHOCH) on the timeframe you are trading. Minor intraday fluctuations that did not produce structural breaks are not valid OTE swings.
- Match the swing timeframe to your entry timeframe. For 4H/1H entries, use Daily or 4H swing points. For 15M entries, use 1H or 4H swing points. Using a 5-minute swing to set up a 4H OTE produces meaningless levels.
- The move must show displacement — a fast, aggressive impulse candle that left behind a Fair Value Gap. Choppy, grinding moves do not create valid OTE swings.
Confluence: What Transforms OTE from Good to Elite
The highest-probability OTE setups occur when the zone aligns with additional confluence. These combinations represent institutional activity confirmed by multiple independent tools simultaneously:
| OTE + Confluence combination | Why it significantly strengthens the setup |
|---|---|
| OTE + Order Block | OTE shows where Fibonacci math expects a reaction. The Order Block shows where institutional orders were actually placed. When both point to the same price level, the probability is dramatically higher. |
| OTE + Fair Value Gap | Price retracing into an FVG within the OTE zone combines the imbalance fill tendency with the Fibonacci reaction zone. Two independent reasons to expect a reaction at the same level. |
| OTE + Volume Profile VAL/VAH | When the OTE zone aligns with a Value Area boundary, institutional order flow is confirmed by real volume data. The convergence of Fibonacci, structure and volume is a very high-conviction setup. |
| OTE + Liquidity sweep | Price sweeps a prior low/high (collecting stops), then retraces into the OTE zone before the continuation move. The sweep confirms institutional activity; the OTE provides the precise entry zone. |
| OTE + Kill Zone timing | OTE setup aligning within a London or New York Kill Zone window adds the time-based institutional activity filter on top of the structural and Fibonacci confluence. |
OTE Entry Mechanics: Step by Step
Once the OTE zone is identified with confluence, the entry process is systematic:
Step 1 — Set a limit order at the OTE zone. Typically at the 62% level (aggressive), the 70.2% level (standard), or await lower timeframe confirmation within the zone (conservative). For most developing traders, the 70.2% level with a 15-minute confirmation candle is the recommended default.
Step 2 — Place the stop loss. Beyond the 78.6% level for a tight stop, or below the full swing low for the broadest stop. The choice depends on where price would structurally invalidate the setup. If the swing low is just 10 pips below the 78.6% level, use that. If the swing low is 50 pips below, the tight stop at 78.6% may be the better risk management choice.
Step 3 — Set the target. At minimum, the prior swing high (for longs) or swing low (for shorts). Fibonacci extensions help identify the most probable target: the 1.272 extension is the conservative target, the 1.618 extension is the standard target for a strong trending setup.
Step 4 — Calculate R:R before entry. The OTE zone, by design, provides a tight entry and logical stop placement. If the R:R calculation produces less than 1:2, the target is too close or the stop is too wide — do not take the trade.
| Entry approach | Fibonacci level | Stop placement | Best for |
|---|---|---|---|
| Aggressive | 62% (OTE zone start) | Below 78.6% | Strong HTF trend, Order Block at 62%, high-volume session |
| Standard (recommended) | 70.2% (Golden Pocket centre) | Below 78.6% or swing low | Most setups — best balance of entry quality and probability |
| Conservative | Confirmation candle within 62-79% zone | Below swing low | Lower HTF conviction, developing traders building confidence |
OTE Practical Examples by Instrument
Gold (XAU/USD) — London Kill Zone OTE
Gold at $2,350 makes an impulsive 4H move from $2,280 to $2,350 (a $70 impulse), creating a BOS on the Daily chart and leaving a bullish FVG between $2,320 and $2,330. The daily bias is bullish. Price is in discount. The Fibonacci retracement from $2,280 to $2,350 places the 62% level at $2,306.60 and the 78.6% at $2,295.02. A bullish Order Block sits at $2,307 to $2,311, right at the 62% level. The setup: limit buy at $2,308 (top of Order Block, within OTE zone), stop at $2,293 (below 78.6%), target at $2,370 (prior swing high, 1.272 extension). Risk: $15. Reward: $62. R:R approximately 1:4.1.
NQ (Nasdaq futures) — New York Kill Zone OTE
NQ at 18,500 makes an impulsive 1H move from 18,200 to 18,500 (300 points) during the London session, creating a BOS. The 4H trend is bullish. Price is in discount. The Fibonacci retracement from 18,200 to 18,500 places 62% at 18,314 and 78.6% at 18,264. A 15M FVG sits between 18,290 and 18,320, within the OTE zone. New York Kill Zone opens. Price retraces into the FVG at 18,305, forms a 5M bullish rejection candle. Entry at 18,310, stop at 18,260 (below 78.6%), target at 18,550 (1.272 extension). R:R approximately 1:4.8.
Frequently Asked Questions
What is the difference between OTE and a standard Fibonacci retracement entry?
A standard Fibonacci retracement entry places a trade at 61.8% because the level is significant. OTE uses the 62-79% zone as a target area, then requires additional confluence — an Order Block, FVG, or Volume Profile level — within that zone before entering. The entry is at the confluence level within the OTE zone, not at the Fibonacci level itself. Additionally, OTE requires premium/discount zone filtering and HTF structural alignment before the Fibonacci is even drawn. It is a more complete, more selective approach that produces significantly higher-quality setups than raw Fibonacci entry.
Does OTE work on all timeframes?
Yes, but the timeframe of the impulse swing should match the timeframe of the trade. A 4H impulse swing produces OTE levels relevant for 4H and 1H entries. A 15M impulse swing produces OTE levels relevant for 15M and 5M entries. Using a 5M swing to create OTE levels for a 4H trade produces meaningless levels that have no structural significance. Always match the swing timeframe to your execution timeframe.
What happens if price moves through the entire OTE zone without reacting?
If price trades through the 78.6% level and continues significantly lower (for a bullish setup), the original impulse swing may not be a valid OTE anchor. Two possibilities: either the swing you measured was not a genuine institutional impulse (not validated by a structural break), or the HTF bias has changed and the bullish thesis is no longer valid. In either case, the trade thesis is invalidated. No entry. Reassess the structure from the higher timeframe and identify the new relevant swing.
Should I use OTE for all my entries or only in specific situations?
OTE is most effective for continuation entries during established trends, where price has made a clear structural break and is retracing before the next leg. It is less applicable to reversal trades at major HTF extremes (where Order Blocks and liquidity sweeps are more relevant entry tools) or to breakout trades where price is not retracing at all. For most intraday and swing setups in trending markets, OTE combined with a confirming Order Block or FVG is the highest-precision entry approach available within the ICT framework.
Can I use OTE without understanding the full ICT framework?
You can apply the mechanical Fibonacci zone in isolation, but the results will be inconsistent. The power of OTE comes from its integration with market structure (knowing the HTF bias), premium/discount filtering (knowing which half of the range to trade in), confluence tools (knowing which level within the OTE zone to enter at), and session timing (knowing when institutional activity validates the setup). Without these surrounding concepts, you are entering at a Fibonacci level — which is useful but not precision trading. Learning OTE correctly means learning the full context it operates in.
▶ ▶ ▶ Continue Reading
Complete the ICT precision entry framework
The Complete Trader’s Edge
OTE is covered in depth in Chapter 32
The complete ICT and blended framework across 30+ Method chapters — from market structure and liquidity through Order Blocks, FVGs, OTE, Breaker Blocks and the full precision entry system. Available on Amazon in Kindle, paperback and full-colour editions.
 The Complete Trader's Edge
The full Mind · Method · Money framework. 70 chapters.
View on Amazon →
The Complete Trader's Edge
The full Mind · Method · Money framework. 70 chapters.
View on Amazon →
 Market Mayhem
400 years of bubbles, crashes, and the pattern that keeps repeating.
Buy on Amazon →
Market Mayhem
400 years of bubbles, crashes, and the pattern that keeps repeating.
Buy on Amazon →